
These sweet little bunny, lamb and chick eggs are quick and easy to put together. You can make some together with your littles for a fun Easter craft, or make some to hide for the great hunt!
I'm always trying to find new ideas for Easter eggs. While dyeing and decorating the eggs is super fun, if your littles are anything like mine there is no way those eggs are going to be eaten after that! So they sit until they either crack or begin to get a bit smelly, and I have to negotiate an exit deal. Throwing anything away is a tough sell around here, but something we've made?! Forget it. Especially if you put a face on it, then it's game over.
So this year, I made these little eggs and thought I would share the pattern with you, so can download and follow along with the tutorial to make your own at home.
get the free pattern here.
DIY Easter egg bunny, lamb and chick
Materials you'll need:
- different colours of wool felt
- embroidery floss in matching and contrasting colours
- poly fibre stuffing (or other stuffing material)
- scissors and embroidery needle
For this project, I used white wool felt and hand-dyed it in tea for the brown bunny, and turmeric for the yellow chick. You can use whatever felt you have, and even try a whole range of colours to fill your basket.

Step by step:
1. Download the pattern here, and cut out all the pieces. You'll need four pattern pieces to make each egg, as well as the pieces for the ears and beak.
2. Laying two of the pattern pieces together, sew up the edge using a blanket stitch. Smaller stitches will make it easier to stuff the egg and gives a nice clean edge.
You can see how to sew a blanket stitch here:
3. Repeat the same process for the other two pattern pieces.

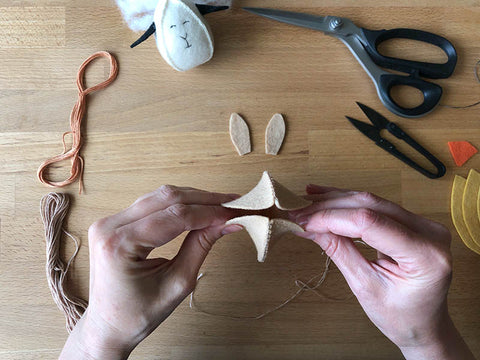
4. Fit both halves of the egg together, and trim any extra corners that might be sticking out. Then sew up the third side and most of the last side, being sure to leave an opening to stuff the egg.
5. Stuff the egg with poly fibre, and sew the opening closed. If you don't have poly fibre, you can use small bits of scrap fabric, or even shredded paper will work, as long as you remember not to give your eggs a bath!

6. The last step is to attach the ears and embroider a little face if you like. I used a contrasting colour of thread for the eyes, nose and mouth. You can also use a fabric marker to draw on the face, if you prefer. The best choice here is a permanent pigment that doesn't need to be heat set.

7. Repeat the same process for the bunny, chick and lamb patterns, and have fun hiding them with your Easter treats!

If you try these at home, be sure to take a picture and share it with us! We love to see what you get up to. Hop to it!
xx gogo and martin
Leave a comment